

Christmas Cheer Headband
An Original Crochet Pattern by A Stitch In Time Crocheting
A little holiday cheer, one stitch at a time!
About the Pattern
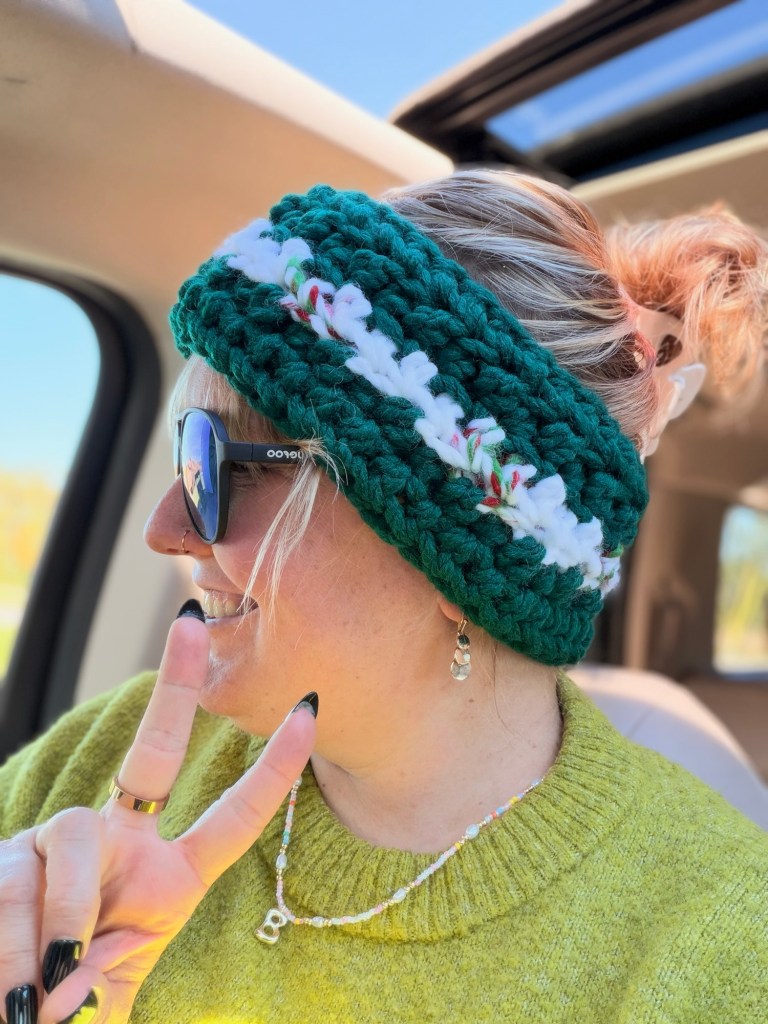
Get into the holiday spirit with the Christmas Cheer Headband! This quick and cozy crochet project combines super bulky yarn, festive color changes, and alternating front-loop and back-loop stitches to create a beautifully textured winter accessory.
Perfect for Christmas gifts, holiday markets, or adding a handmade touch to your winter wardrobe!
Skill Level: Beginner Friendly
Terminology: US Crochet Terms
Construction: Worked flat in rows, then seamed
Total Rows: 5
Materials
Lion Brand Wool-Ease Thick & Quick yarn (Super Bulky #6)
K (6.5 mm) crochet hook
Main color (Color A)
White or preferred contrasting color (Color B)
Additional festive color (Color C)
Yarn needle
Scissors
Abbreviations
CH – Chain
HDC – Half Double Crochet
FLO – Front Loop Only
BLO – Back Loop Only
ST(S) – Stitch(es)
FO – Fasten Off
Pattern Notes
This pattern uses US crochet terminology.
Beginning and turning chains do not count as stitches.
Regular HDC stitches are worked through both loops.
Textured rows alternate BLO and FLO HDC.
The first and last stitches of textured rows are regular HDC.
CH 1 and turn at the end of Rows 1–4.
Work five rows total.
The headband is joined by sewing the two short ends together.
Finished size will vary depending on tension.
Stitch Count Note: A foundation CH 38 with the first HDC worked into the second CH produces 37 HDC stitches. This pattern uses 37 stitches throughout.
Crochet Instructions
Foundation
Using Color A, CH 38.
Row 1 — Foundation Row
HDC in the 2nd CH from the hook and in each remaining CH across.
CH 1, turn.
(37 HDC)
Row 2 — Textured Row
HDC in the first ST.
HDC in BLO of next ST, HDC in FLO of next ST.
Repeat from * to * until one ST remains.
HDC in the final ST.
CH 1, turn.
(37 HDC)
Row 3 — Contrasting Color
Change to Color B (white or preferred contrasting color).
Repeat Row 2.
CH 1, turn.
(37 HDC)
Row 4 — Festive Color Change
Change to Color C.
Repeat Row 2.
CH 1, turn.
(37 HDC)
Row 5 — Final Row
Continuing with Color C, HDC in each ST across, working through both loops.
(37 HDC)
FO, leaving a long yarn tail for sewing.
Assembly — Joining the Headband
Lay your completed headband flat with the textured side facing up.
Bring the two short ends together, ensuring the edges are aligned and the band is not twisted.
Thread the long yarn tail onto your yarn needle.
Sew the short ends together using a whip stitch or mattress stitch.
Secure your seam and weave in all remaining yarn tails.
Turn the headband so the seam rests on the inside.
Your Christmas Cheer Headband is complete!
Helpful Tips
Color combinations: Try red, white, and green for a traditional Christmas look, or mix your favorite holiday colors.
Texture: Pay attention to your FLO and BLO placement to keep the textured rows consistent.
Fit: Before sewing, wrap the headband around your head to check the fit. If necessary, adjust the foundation chain and maintain the same stitch pattern.
Finishing: Sew the ends securely, especially if your headband will be worn frequently.
Copyright & Pattern Usage
© 2026 A Stitch In Time Crocheting. All Rights Reserved.
This written crochet pattern is the original work of A Stitch In Time Crocheting.
Please do not copy, reproduce, redistribute, resell, or publish this written pattern without written permission.
You are welcome to sell finished handmade items created using this pattern. Credit to A Stitch In Time Crocheting as the original designer is always appreciated.
A Note from Rebecca
There’s something extra special about handmade creations during the Christmas season!
I hope this cozy little headband brings warmth, joy, and a touch of holiday cheer to whoever wears it. Whether you’re making one for yourself or gifting it to someone special, remember that every stitch is made with a little love.
Thank you for crocheting along with me and being part of this wonderful creative community!
Happy crocheting and Merry Christmas! 🎄
~Becca
A Stitch In Time Crocheting


Leave a Reply